Warm Up Exercises
As this is the first class, we just did the Back and Shoulder Weight exercise.
Hand positions
1st – thumb down, palm to the right (outside)
2nd – palm down, thumb to the left (inside)
3rd – thumb up, palm to the left (inside)
4th – palm up, thumb to the right (outside)
How to hold the Sword
Regardless of whether you prefer one or two fingers over the cross, there are a few critical things they both have in common. Firstly, the sword is held between the thumb and the first joint of the forefinger. This allows the point to be manipulated via finger pressure, which is very quick and energy efficient. It means the sword is balanced on the finger joint rather than held by the muscles of the hand. The thumb should be straight not bent, and pointing down the length of the blade. None of the fingers should be wrapped around the sword or it’s furniture. Wrapped fingers engage your hand muscles, which in turn will fatigue quickly losing all your hard learnt point control.
This is essentially, a neutral hand position. A quick way to find a neutral hand position is to flex the hands wide and hold it for a few seconds, and then completely relax the muscles in the hand. The fingers should adopt a neutral hand position after relaxation. Insert the ricasso between the thumb and forefinger, and let the rest of the fingers assume their natural position around the sword.
Guard position
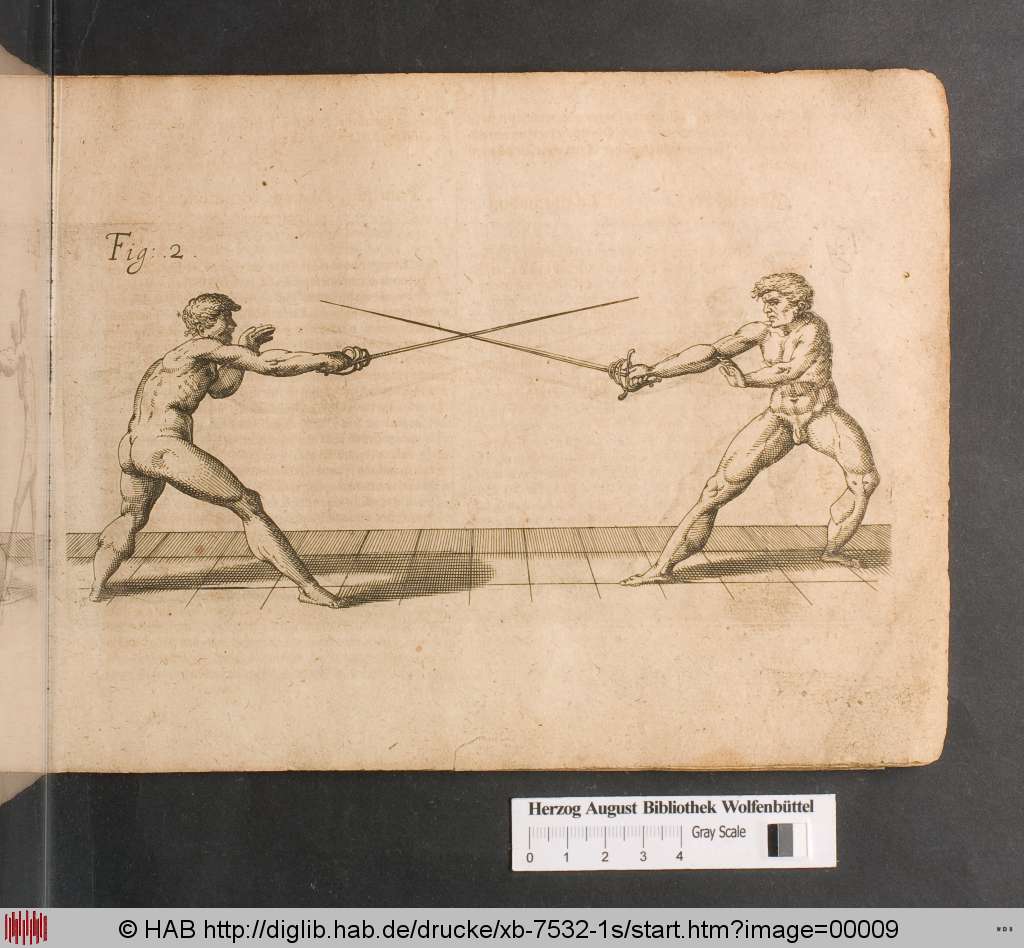
Terza (the image on the right)

The terza guard, so named because the hand is in third, is the default on guard position we will use through out the course.
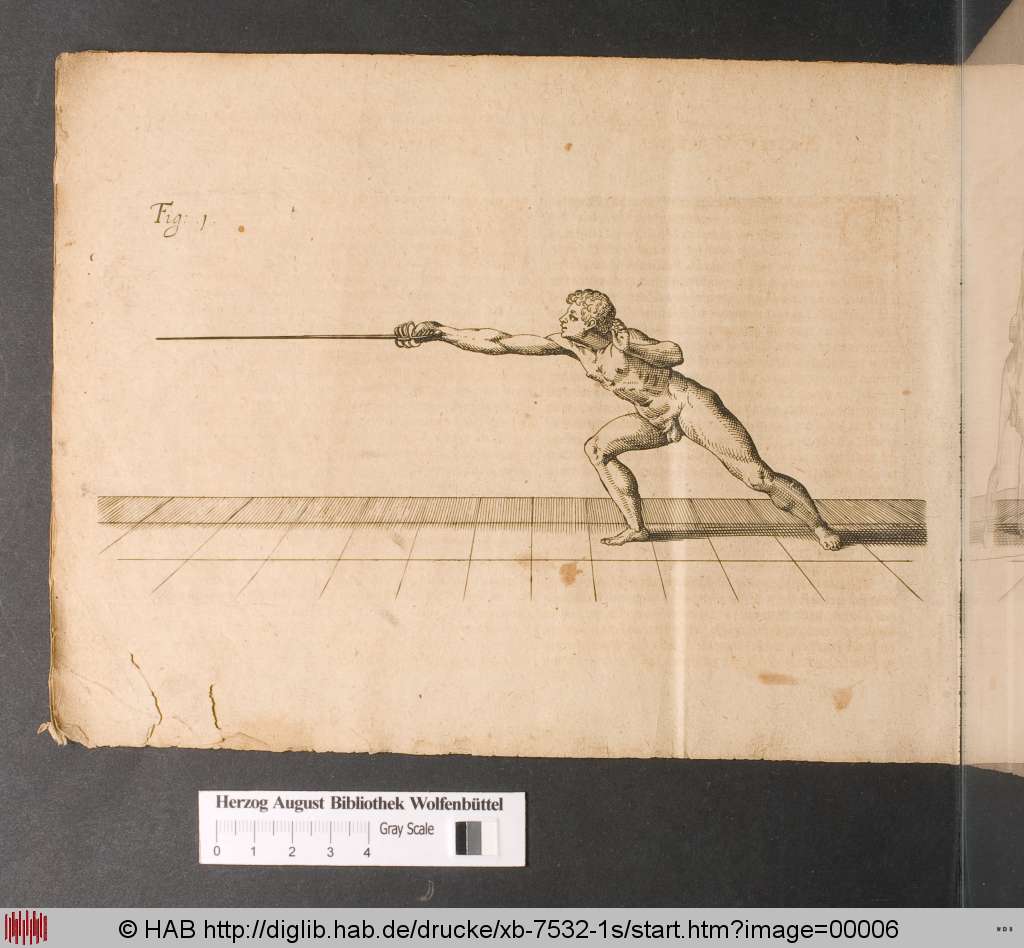
The Lunge
The lunge is the basis of the majority of attacks you’ll ever throw, and is one of the foundation skills in Italian Rapier.
This is how to stick the point in the other guy quickly and with relative safety.
The lunge derives it name from the original Italian term for this action, the stocatta lunga. Tactically, the lunge is used to deliver a quick attack that also allows us to quickly recover back to a safe distance.

How to Teach the Lunge
The lunge is a complex action that must be broken into its component elements so that the student understands the correct action. The following teaching sequence has been found to rapidly instill an understanding of the correct actions in fencing students. The instructors call is shown first.
- Come on guard!
Come on guard without the sword in hand, in Giganti’s basic guard of Terza. - Extend the arm!
From the on guard position, extend the arm to full extension, without locking the elbow. - Extend and translate forward!
Start by extending the arm forward, and then at full arm extension translate the hips forward, moving from a back weighted to a front weighted stance. At the same time you translate you should start to lift the toes of the front foot slightly upwards. - Extend, translate and kick!
Start by extending the arm, then translate the body forward as you lift the front toes, then kick out to the point where the front foot lands on its heel. The body should not move forward, and the front thigh should stay close to parallel to the ground. Recover the front foot back to guard. Repeat this action 10 times. - Extend, translate, kick and drive the body forward!
Start by extending the arm, then translate forward as you lift the toes, kick and then drive the body forward by straightening the back leg. The front knee comes back over the front instep. Again recover back to guard and repeat this action 10 times. - Extend, translate, kick, drive with a snap!
Extend the arm, translate forward as you lift the toes, kick, drive and as the back leg drives the body forward, snap the offhand up beside the side of the head. Recover back to guard and repeat 10 times. - Lunge!
Repeat the last sequence, but this time with the sword in hand. - Lunge and Recover!
Repeat the last sequence, but this time perform the lunge, then immediately recover back to guard. The key to the recovery is to pull the head back first, and to then pull the body backwards using the quad muscles of the rear leg.
Cementing Drills
1. Lunge with Resistance bands
The use of the elastic resistance bands helps the students learn the difference between a correct rear leg driven lunge, and the incorrect gravity lunge.
2. Understanding the Measure of the Lunge
The distance at which we can hit in the lunge is a crucial piece of knowledge that the student needs to learn. This drill is designed to teach the students proper measure, and the basics of how to correct their own technique to achieve the correct end result.
- Working in pairs, have the passive student stand upright as a focus target. The active student will then completely extend into the full forward lunge position, and position themsenlves such that are just touching the passive student.
- The active student recovers in terza guardia, and then lunges to touch the passive student. Make sure the Active student begins with the proper extension of the arm.
- Correct the distance and stance such that the student is again just touching the passive student. Common mistakes are excessively big steps on the lunge, excessive body lean, hunched shoulders and bent arms.
- Repeat 10 times, and then switch roles between the students.
